This is a simple tutorial on using image adjustments to make a colorful, graphic image.
Create a new folder on your network drive. Name that folder Graphic Portrait.
1. The first thing you want to do is take a picture of another classmate. Please review portrait photography techniques from the previous post.
2. Crop the image if needed. I decided that I did not like the window and the fire sign. I used the crop tool in the tool box to crop those objects out. I also cropped the image so that it was vertically long rather than horizontally long.

3. Duplicate the image in the layers palette 2 or 3 times. The short-cut is Ctrl+J.
4. Image Adjustments - Threshold. Threshold is an image adjustment that converts a color image into a high-contrast, black and white image. Make sure to select the top layer first. Go to Image > image adjustments > threshold. You will need to scroll left or right to get the contrast you desire.
Here is my result.
5. Image Adjustments - Hue and Saturation. Hue and saturation is another image adjustment. Hue is another word for color. Make sure to turn the visibility off on the top layer and then select the the 2nd layer down first before you start working. I decided to really play with the hue control. I wanted bright, exaggerated colors. There have been times I have turned up the saturation and contrast control in order to get brighter colors.
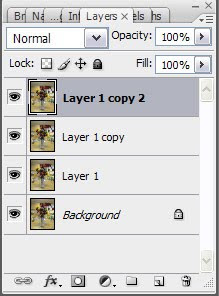
Here are what all the layers look like in the layers palette. I have the layer with the threshold image, one layer with the hue adjustment and the original image on the bottom. I always like to keep a copy of the original image in case I need to start over. Make sure the threshold image is on top in the layers palette.
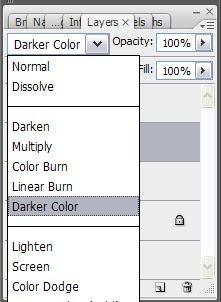
6. Blend Mode. The one layer with the threshold adjustment will have a blend mode applied. Blend modes take either the black or the white pixels and blend them into the layer underneath. I would like you to choose a blend mode that gives you strong black shadows. I will let you choose the best blend mode that works for your image.
7. Save. Here is the finished image. Please save this project in your Photoshop folder and name it studentname portrait.psd.


No comments:
Post a Comment